
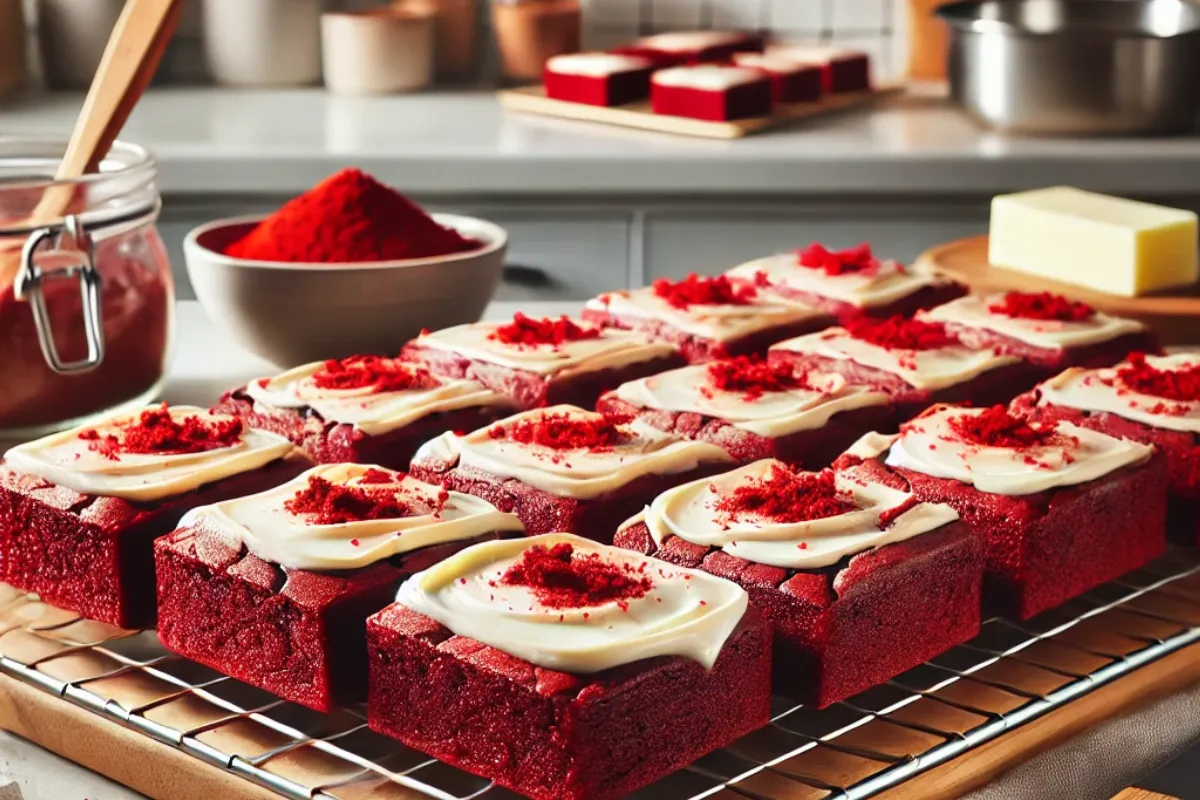
Red velvet brownies are a delightful fusion of traditional brownie texture and the rich, slightly tangy flavor of red velvet cake. They stand out not only because of their vibrant red color but also for their unique balance of flavors, which include a touch of cocoa, vinegar, and a luxurious cream cheese frosting. In this guide, we’ll dive deep into what makes red velvet brownies special, breaking down the essential ingredients, variations, and the science behind the flavors.
1. What Exactly Are Red Velvet Brownies?
Red velvet brownies are a unique twist on the classic brownie, bringing in the iconic red velvet flavor profile. Unlike regular brownies, which are often purely chocolate-based, red velvet brownies incorporate both cocoa powder and vinegar, offering a delicate balance of rich chocolate flavor with a tangy undertone.
2. Key Ingredients That Define Red Velvet Brownies
To make the perfect batch of red velvet brownies, you will need the following core ingredients:
- Flour: Provides structure to the brownies.
- Cocoa Powder: Adds depth of flavor while contributing to the subtle chocolate note typical of red velvet.
- Butter: Ensures the brownies stay rich and moist.
- Sugar: Adds sweetness and helps with browning during baking.
- Eggs: Acts as a binding agent and gives the brownies a soft, chewy texture.
- Red Food Coloring: This gives the brownies their iconic red hue, making them visually striking.
- Vinegar: An essential part of the chemistry of red velvet, combining with the cocoa powder to enhance flavor and create the iconic red velvet taste.
- Vanilla Extract: Adds a sweet aroma and rounds out the flavors.
- Salt: Balances the sweetness and enhances the other flavors.
- Cream Cheese: Usually used for the frosting, adding a creamy, tangy layer that complements the rich brownies.
Pro tip: Always use red gel food coloring to achieve the brightest and most vibrant red color without altering the texture of the batter.
3. The Role of Cocoa and Vinegar
Red velvet brownies would not be complete without the subtle chocolate flavor provided by the cocoa powder. Unlike traditional brownies that are rich in chocolate, red velvet brownies only include a hint of cocoa powder. This slight addition, when paired with vinegar, creates the signature red velvet taste—a mix of tangy and cocoa flavors.
It’s this combination that sets them apart from other chocolate desserts and makes them a fan favorite at gatherings.
If you’re curious about how cocoa powder and vinegar interact in baked goods, check out this guide on baking chemistry.
4. Making the Perfect Cream Cheese Frosting
One of the key components of any red velvet dessert is its frosting, and red velvet brownies are no exception. Cream cheese frosting is a must, adding a tangy, creamy contrast to the rich brownies. To make this frosting, you’ll need the following:
- Cream Cheese: Room temperature for easier mixing.
- Butter: Adds a smooth and creamy texture.
- Powdered Sugar: Sweetens the frosting while maintaining a soft texture.
- Vanilla Extract: Adds depth to the frosting’s flavor.
To achieve the perfect consistency, beat the cream cheese and butter together until smooth. Then, gradually add the powdered sugar, continuing to mix until fluffy. Finally, add vanilla extract for flavor. Spread this frosting generously over the cooled brownies for the ultimate finishing touch.
For more tips on creating frostings, visit this ultimate frosting guide.
5. Variations of Red Velvet Brownies
For those who like to experiment, there are several exciting variations you can try to mix things up:
- White Chocolate Chips: Add white chocolate chips to the batter for a sweet, creamy contrast to the dark brownie base.
- Cream Cheese Swirl: Before baking, swirl some extra cream cheese mixture into the brownie batter for a marbled effect.
- Nuts: For added texture, consider incorporating chopped pecans or walnuts into the batter.
- Red Velvet Cake Mix Brownies: For an even easier version, use a boxed red velvet cake mix as the base for the brownies. This shortcut delivers consistent results while saving time.
6. Step-by-Step Recipe: How to Make Red Velvet Brownies
Making red velvet brownies is relatively simple. Here’s how to do it:
Ingredients:
- 1 cup butter (melted)
- 1 ½ cups granulated sugar
- 2 large eggs
- 2 tablespoons cocoa powder
- 1 tablespoon red food gel
- 1 teaspoon vanilla extract
- 1 teaspoon white vinegar
- 1 ¼ cups all-purpose flour
- Pinch of salt
For the Cream Cheese Frosting:
- 4 oz. cream cheese (softened)
- 4 tablespoons unsalted butter (softened)
- 1 teaspoon vanilla extract
- 2 cups powdered sugar
Instructions:
- Preheat your oven to 350°F (175°C). Grease and line an 8×8-inch baking pan.
- In a large bowl, whisk together the melted butter and sugar until smooth.
- Add the eggs, cocoa powder, red food gel, vanilla extract, and vinegar, whisking until combined.
- Fold in the flour and salt, mixing until just combined.
- Pour the batter into the prepared baking pan and bake for 25-30 minutes or until a toothpick inserted into the center comes out clean.
- Let the brownies cool completely before frosting.
- To make the frosting, beat the cream cheese and butter together until smooth. Add the vanilla extract, then gradually beat in the powdered sugar until fluffy.
- Spread the cream cheese frosting over the cooled brownies, then slice and enjoy.
7. Serving and Storing Tips
Red velvet brownies can be served at room temperature or chilled, depending on your preference. If you’re planning to store them for later, here’s how to do it:
- Unfrosted Brownies: Store in an airtight container at room temperature for up to three days.
- Frosted Brownies: Store in the fridge for up to five days to keep the cream cheese frosting fresh.
- Freezing: You can freeze both frosted and unfrosted brownies for up to three months. Wrap them individually in plastic wrap and store in an airtight container or freezer bag.
8. FAQs About Red Velvet Brownies
- What makes red velvet brownies different from regular brownies?
- Red velvet brownies incorporate cocoa powder and vinegar, giving them a slight tang and a mild chocolate flavor. They also get their distinct red color from food coloring.
- Can I make red velvet brownies without food coloring?
- Yes! If you prefer a more natural version, you can skip the food coloring or use a plant-based alternative. However, they won’t have the iconic red color.
- Do I need to refrigerate red velvet brownies with cream cheese frosting?
- Yes, because of the cream cheese frosting, it’s best to store the brownies in the fridge to prevent the frosting from spoiling.
- Can I make gluten-free red velvet brownies?
- Absolutely! Substitute the all-purpose flour with a 1:1 gluten-free flour blend.
- How do I achieve a fudgy texture?
- Use less flour and avoid overmixing the batter to keep the brownies dense and fudgy. Adding more butter and eggs also helps achieve this texture.
9. Internal Linking Opportunities
For better SEO, you can link to related recipes or topics within your own website. Here are a few internal linking suggestions:
- Link to Ultimate Brownie Cake Recipe when discussing brownie variations to provide readers with another rich, fudgy brownie recipe.
- Mention the What Makes Brownies Fudgy vs. Cakey article when explaining how to achieve the perfect texture for your red velvet brownies.
- If you’re explaining how to substitute ingredients, link to Can I Use Greek Yogurt Instead of Butter in Brownies.
10. Nutritional Information
A typical red velvet brownie with cream cheese frosting is rich and indulgent, providing a high amount of calories and fat due to the butter, sugar, and cream cheese content. However, you can make healthier substitutions (such as using Greek yogurt in place of butter or sugar alternatives) to reduce the calorie count.
11. Conclusion
Red velvet brownies are the perfect treat for anyone who loves the tangy flavor of red velvet cake but prefers the dense, fudgy texture of brownies. Whether you enjoy them plain or topped with a thick layer of cream cheese frosting, these brownies are sure to be a hit. Don’t forget to experiment with fun variations like white chocolate chips or a cream cheese swirl to make this recipe your own.
For more tips on baking with unique ingredients, head over to this comprehensive ingredient substitution guide to explore further ways to enhance your recipes!